Your First Mechanical Keyboard Mods: A Beginner's Guide to Keycaps & Switches

You’ve taken the plunge into the world of mechanical keyboards and discovered the joy of a superior typing experience. But the journey doesn't have to stop at the stock model. The real magic of this hobby lies in keyboard modding—the process of customizing your board to make it truly, uniquely yours. Going beyond the stock configuration allows you to fine-tune the sound, feel, and look of your keyboard to perfectly match your preferences. This guide will introduce you to a few simple, beginner-friendly mods that can transform your keyboard from a tool into a personalized masterpiece.
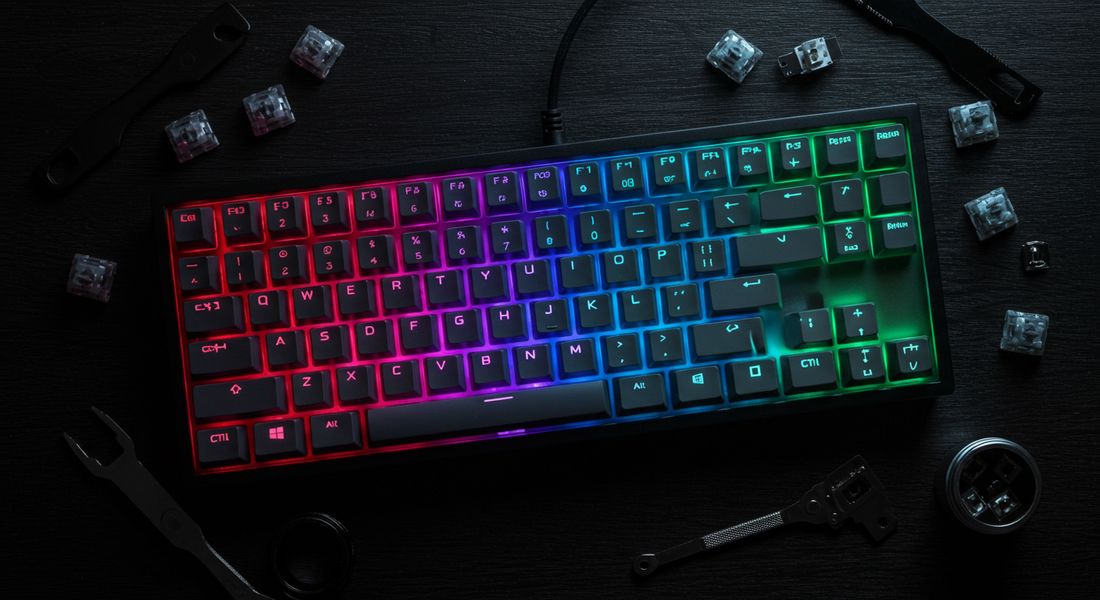
The Easiest First Step: Swapping Keycaps
The most impactful and simplest first mod is changing your keycaps. This is the fastest way to completely change the aesthetic of your board.
-
A Guide to Materials:
-
ABS (Acrylonitrile Butadiene Styrene): This is the most common plastic used for stock keycaps. It's smooth and allows for vibrant colors, but it can develop a shine over time with use.
-
PBT (Polybutylene Terephthalate): Considered a more premium material, PBT is more durable, has a slightly textured feel, and is resistant to the "shining" effect from finger oils.
-
-
A Guide to Profiles: "Profile" refers to the shape and height of the keycaps. Most standard keyboards use a sculpted OEM or Cherry profile, which is comfortable and familiar. Exploring different custom keycaps in various profiles can dramatically change the feel of typing.
The Sound of Satisfaction: An Intro to Lubing Switches
Ever wonder how keyboard enthusiasts get that incredibly smooth, satisfying sound from their keyboards? The secret is often lube. Learning how to lube keyboard switches is a game-changer for acoustics and feel.
-
What is Lubing? This process involves disassembling each individual switch and applying a thin, specialized lubricant (like Krytox 205g0) to the internal components, such as the stem and housing.
-
Why Do It? Lubing reduces the friction inside the switch, resulting in a much smoother keypress. It also dampens unwanted spring ping and scratchy sounds, leading to a deeper, cleaner, and more pleasing acoustic profile. While it can be a time-consuming process, the aural and tactile payoff is immense for any DIY mechanical keyboard enthusiast.
The "Thock" Factor: Simple Foam & Tape Mods
Two of the most popular and budget-friendly mods for improving your keyboard's sound are the foam and tape mods. These are designed to reduce hollowness and create a deeper sound signature.
-
The Foam Mod: This involves opening your keyboard case and adding a layer of dense foam (like neoprene or sorbothane) to the bottom. This fills the empty space, dampening vibrations and eliminating the hollow, metallic sound that many stock plastic cases have.
-
The Tape Mod: This technique involves applying a few layers of painter's tape to the back of the keyboard's PCB (Printed Circuit Board). This subtly alters the acoustic properties, reflecting sound waves in a way that often results in a deeper, "thockier" sound profile.
Conclusion: Creating a Keyboard That's Uniquely Yours
The joy of keyboard modding is in the process of discovery. It's about taking a mass-produced product and turning it into something that is a complete reflection of your personal taste, from the color of your keycaps to the sound of a single keystroke.